How to Repair a Dishwasher That’s Not Drying Dishes?
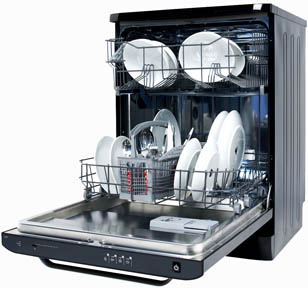
A dishwasher that won’t dry dishes properly can disrupt your daily routine, leaving you with a pile of wet dishes, dirty glasses and excess water to manage. Whether your dishwasher uses condensation drying on its stainless steel walls or a heating element to produce hot air, subpar drying means opening the door to moisture and potential issues like food residue or watermarks. In this blog, we’ll explore how to repair a dishwasher that’s not drying dishes, focusing on easy steps to identify common causes—from rinse aid problems to faulty components—so you can restore that dry, ready-to-use dishware.

Identify Common Reasons for Inadequate Dishwasher Drying
Even modern dishwashers designed with the latest dry cycle or heat features can falter, leaving dishes damp. Recognizing typical culprits allows for more targeted fixes:
- Improper loading: Overcrowded dish racks block airflow, trapping droplets.
- Incorrect cycle settings: Some wash cycle modes (like quick-wash) may not include a thorough dry option.
- Lack of rinse aid: Eliminating water droplets with rinse solutions is vital for efficient drying.
- Heating element failure or a miscalibrated high-limit thermostat: Essential for generating the right temperature.
- Blocked or inefficient vent function: Dishwashers relying on vented drying need an unobstructed path for steam to escape.
Identifying these root causes early can spare you extra cleaning, saving both time and frustration.
Assess Improper Loading Techniques
Ensure Correct Arrangement
Dishware requires strategic spacing so hot air or water can circulate effectively:
- Keep plastic items and smaller containers on the top rack to avoid direct heat from below.
- Angling cups or bowls helps water drain off instead of pooling.
- Avoid stacking plates over each other, obstructing spray arms or vents.
Overcrowding leads to water trapped between items, while angled or horizontal surfaces hamper drainage. A bit of space around each piece and a well-designed layout ensures the heat disperses for optimal dryness.
Check Cycle Settings for Dishwasher Drying Efficiency
Reviewing Your Dishwasher’s Options
Many dishwasher models come with different cycle choices—like auto, “quick wash,” or “heavy.” Some short cycles skip the heated dry cycle to save energy, leaving dishes moist:
- Longest or “Pots and Pans” cycles typically include robust drying steps.
- A specialized “Heated Dry” or “Extra Dry” button intensifies heat near cycle’s end.
Temperature & Time
Confirm your chosen cycle hits higher heat and extends the drying phase. If your control panel or electronic screen shows alternative dryness settings, toggling them on can curb leftover water.
Evaluate the Use of Rinse Aid
Why Rinse Aid Matters
Rinse aid lowers surface tension of water, letting it slide off dish surfaces more easily. Without it, you risk water droplets clinging to plates or glassware, thus prolonging dryness.
Refilling and Adjusting
Check the rinse aid dispenser in your dishwasher and top it off if empty. Many washers provide an adjustable dial controlling how much rinse agent is dispensed per cycle. Hard water areas might need more to combat mineral buildup, while soft water areas may need minimal or moderate amounts.
Inspect the Heating Element Functionality
Heating Element’s Role
Underneath or at the bottom of the dishwasher tub lies the metal or coil-based heating element that warms the air during the final dry cycle. If this coil breaks or loses continuity, the dishwasher can’t produce enough hot air to drive away moisture.
How to Check
- Power off the appliance at the breaker.
- Use a multimeter on the coil’s terminals to test for continuity. A reading of infinite resistance or zero indicates potential failure.
- Look for scorched spots or broken sections along the coil.
A faulty or half-burnt element necessitates either replacement or a professional technician inspection, restoring the heated dry process.
Examine the High-Limit Thermostat for Faults
High-Limit Thermostat Purpose
This thermostat ensures the dishwasher interior doesn’t overheat during the drying phase. If it’s stuck open or incorrectly senses the temperature, the heating coil might remain inactive, producing less or no heat.
Checking
- Locate the thermostat (often near the bottom panel or behind an access panel).
- Inspect for wiring damage or discolored plastic housing.
- Use a meter for continuity. If it reads open circuit at normal conditions, the thermostat is likely defective.
Replacing a faulty high-limit thermostat is a relatively straightforward fix that can dramatically improve dryness outcomes.
Ensure the Vent Is Unobstructed and Functioning
Vented Drying
Certain dishwasher designs utilize a vent near the door or top panel to release moist steam. If steam can’t escape, condensation forms, leaving dishes wet.
Verifying
- Check for blockages like leftover packaging or sticky residue on vent flaps.
- Confirm any small fan or motor (in select dishwasher models) operates properly.
- If the vent’s mechanical or electronic components break, it can hamper the entire drying process.
Adjust Dishwasher Settings for Optimal Drying
Selecting the Right Temperature
Hot water from your home’s supply fosters better rinsing and evaporation. Aim for around 120-130°F coming from the kitchen faucet. If your water is too cool, it won’t effectively help the dishwasher heat up quickly for final dryness.
Using “Heated Dry” or “Sanitize”
Some washers feature a “Sanitize” or “Extra Dry” setting, superheating the final rinse or drying stage. This can add 20-30 minutes, but it consistently yields drier results—particularly for plastic lids or containers that notoriously cling to water.
Guide on Loading Dishes Properly for Better Drying
Spacing is Key
Dish placement can hamper or help dryness. Bowls, plates, and large cookware need a bit of breathing room so water can drip off, rather than remain pooled or caught between surfaces. For the best coverage from spray arms:
- Angle plates and lids so water runs downward
- Avoid layering small cups inside bigger bowls
- Keep plastic items in the upper rack to dodge direct heat from the heating element
Avoiding Overcrowding and Blocking Spray Arms
Excessive stacking of items quickly leads to leftover droplets. The top spray arm may never touch deep corners if blocked by tall bowls. Distribute items so each region benefits from water streams and subsequent heated airflow.
Troubleshooting Issues with Wash Cycle Settings
Mid-Cycle Observations
Peeking in at mid-cycle is sometimes helpful:
- If the dishwasher stops unexpectedly, the cycle settings might be mismatched.
- Excess foam may hamper dryness. Over-sudsing can also indicate too much detergent or the wrong soap brand.
Solution
Test a normal or high-heat cycle specifically intended to end with a thorough “heated dry.” Check your dishwasher manual for recommended cycle combos if your machine offers advanced or alternative dryness features.
Recognizing Signs of a Malfunctioning Dishwasher
Whether an older or modern dishwasher:
- Noise or grinding during the dry cycle might signal failing fans or motors controlling hot airflow.
- Smelly or moldy interiors suggest leftover moisture—pointing to poor venting or incomplete dryness.
- Dishes consistently emerging “half-dry” or “spotty” might indicate deeper mechanical or electrical troubles.
If repeated quick fixes fail, the underlying cause may be the high-limit thermostat, a broken or melted heating element, or advanced electronic issues in the control panel requiring professional help.
Regular Maintenance Tips for Dishwasher Care
A well-maintained unit ages gracefully, delivering superior performance and dryness:
- Monthly wipe-down: Use warm water and mild soap to remove grease from door seals and edges.
- Clean the dishwasher filter: Avoid caked debris that slows draining or retains moisture.
- Run a vinegar or baking soda cycle monthly for sanitizing the interior. This cuts down on soap residue and foul odors.
- Check for cracked spray arms or bits of foreign materials that hamper water distribution.
When to Call Toronto Refrigeration?
Toronto Refrigeration has long delivered exceptional and reliable help for major appliances, including dishwasher tune-ups. If your dishwasher’s dryness issues persist—like chronic heat malfunction, repeated final rinse mistakes, or potential electrical challenges—our skilled technicians provide thorough checks and advanced part replacements. From misaligned latch assemblies to a failing heat coil or thermostat, we diagnose issues promptly so your kitchen routine remains uninterrupted. With a wide range of brand knowledge—covering everything from older models to advanced Wi-Fi-enabled lines—our appliance experts offer quick, cost-effective solutions tailored to your dishwasher’s unique design.
Conclusion
A proper dishwasher service ensures that each rinse cycle effectively counters water spots, leveraging the correct water temperature so your dishes dry thoroughly. If the machine operates at too low a temperature, you may notice droplets left behind, indicating it’s time for professional attention.
A dishwasher that can’t dry dishes effectively is more than an inconvenience—it risks your kitchen’s hygiene and daily efficiency. loading, insufficient heat, or a defective heating element—you’ll restore proper dryness and produce sparkly, spot-free. Adopting best practices—such as adjusting settings, using the right rinse solutions, and scheduling routine internal cleaning—keeps your dishwasher in prime shape for the long haul. When more advanced issues loom, turning to Toronto Refrigeration ensures expert fixes that let you enjoy a reliably dry, hygienic, and time-saving kitchen companion.