How to fix a leaking refrigerator?
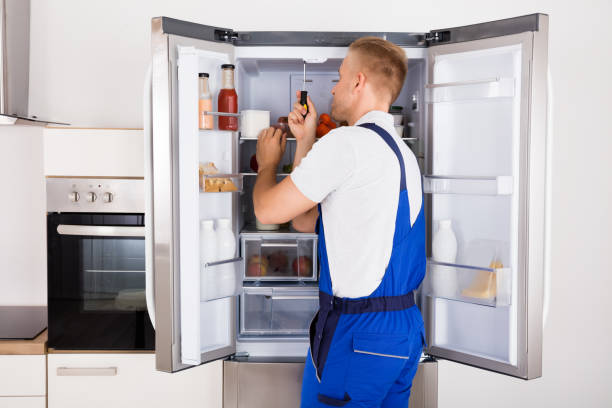
A leaking refrigerator can quickly disrupt daily life—risking water damage, spoiled food, and unwanted stress. Luckily, many leakage problems are easier to diagnose and fix than you’d think. In this blog, we’ll uncover how to spot common causes of fridge leaks, propose simple DIY strategies, and indicate when it’s time to seek professional help.

Addressing Water-Related Refrigerator Issues
Experiencing refrigerator leaks can disrupt daily routines, particularly if water leakage forms a puddle of water on your kitchen floor. Some refrigerator water leak scenarios arise from ice buildup in the freezer or a damaged water line within the system. If the water connection to your ice dispensers or inlet water valve loosens, you may notice pooling and even water discoloration in extreme cases. Ensuring an airtight seal around your refrigerator door seals is equally crucial for preventing excess moisture or frost buildup that accelerates a leaky refrigerator situation.
Beyond basic checks—such as tightening water line connections, confirming correct humidity levels, or verifying the unit’s operation in cold temperatures—it’s wise to arrange a repair service if water continues to accumulate. Routine fridge clean practices, like removing debris in the drain tray and wiping spills, help avoid water buildup or ice cubes forming in odd spots. Still, certain complications, including clogged lines or large quarts of water leaking, require Qualified technicians with specialized tools. If you detect ongoing water problems or frequent unpleasant odors, a service professional can assess the fridge’s core components and correct potential issues—from a failing inlet water valve to compromised door seals. Seeking professional help swiftly saves you from further damage, maintaining your refrigerator’s health and preserving your food’s life.
Identify Potential Causes of Leakage
Refrigerators play a vital role in preserving fresh goods, from produce and beverages to leftovers and beverages in the freezer section. However, a variety of common issues—ranging from clogged lines and faulty seals to poor positioning—can lead to leaks. Recognizing these warning signs and taking immediate action can help you avoid major inconveniences and expensive repairs.
- Blocked Drain or Defrost Drain
- Reason: Over time, leftover food particles and grease can gather in or around the defrost drain, preventing water from properly flowing out.
- Effect: Excess water may leak into the refrigerator compartment or onto the floor, creating puddles or water pools.
- Wrong Temperature or Thermostat Settings
- Reason: Inadequate or faulty temperature adjustments cause excess condensation inside the fridge.
- Effect: Humidity surges lead to water droplets forming along internal surfaces, sometimes accumulating at the base or leaking out the door.
- Damaged or Missing Components
- Reason: Broken door seal or cracked drain tubes undermine the fridge’s ability to contain humidity.
- Effect: Warm air infiltration fosters condensation, resulting in constant water drips or big leaks in severe cases.
- Improper Water Supply Setup
- Reason: Leaky or loose connections for water lines feeding your ice maker or water dispenser can lead to a water trail behind or beneath your fridge.
- Effect: Potential dripping that forms a puddle if the line is not sealed or has a damaged coupler.
By investigating these potential culprits early, you’ll find a suitable fix quickly, restoring normal fridge function without enduring further damage.
1. Check the Defrost Drain for Blockages
1.1 How the Defrost Drain Works
Modern fridges employ a defrost cycle that melts any frost accumulating on evaporator coils, draining the resulting water through a small hole or drain tube near the base. This water eventually flows into a pan at the bottom of the fridge, where it evaporates harmlessly over time.
1.2 Common Issues
- Clogs: Bits of food or built-up ice can clog the defrost drain hose, forcing water to accumulate and eventually seep onto your floor.
- Sludge: Over months, slime or mold can form inside the tube, limiting water flow.
1.3 Fixing the Blockage
To solve a defrost drain clog:
- Disconnect the fridge’s power supply.
- Locate and remove any panel covering the drain area.
- Use warm water mixed with mild soap or soapy water in a turkey baster or squeeze bottle to flush out the drain.
- For more stubborn clogs, gently push a flexible wire or a coat hanger through the drain hole.
- Reinstall panels and power the fridge back on, verifying no further water accumulates around the area.
2. Inspect the Water Supply Lines for Freezing
2.1 Typical Problem Areas
If your refrigerator is equipped with an ice maker or water dispenser, it’s connected to a water inlet valve and supply line. In colder climates or unheated rooms, these lines can freeze:
- Low Temperatures: A fridge placed near a freezer or in a garage with limited insulation.
- Reduced Water Flow: Icy blockages hamper water movement to the dispenser or ice maker.
2.2 Steps to Remedy
- Unplug the fridge to ensure safety.
- Locate the water line near the back; if you see ice blockages, carefully thaw them using a hairdryer on a low setting or by applying warm water.
- Check for potential cracks or loose connections that might lead to further water leaks.
- Reconnect everything securely, and turn your fridge back on. Confirm normal dispensing or ice-making cycle.
3. Examine the Drain Pan for Cracks or Damage
3.1 Why a Drain Pan Matters
Fridges usually have a shallow drain pan beneath the appliance that collects small amounts of condensation or defrost water. Fans or normal ambient heat then evaporate that moisture, preventing drips.
3.2 Signs of Damage
- Frequent or ongoing water puddles under the fridge
- Visible chips, splits, or cracks in the plastic material
- Moist surfaces even after thorough drying
3.3 Resolving the Problem
Remove the drain pan gently, looking for cracks or holes. If you see signs of damage, replacing the part is the best approach—patch attempts might prove temporary. With a new pan in place, confirm the fridge can properly evaporate excess water.
4. Assess the Door Seals for Wear and Tear
4.1 Impact of Faulty Seals
A loose seal or damaged gasket means outside air enters the refrigerator or freezer compartments, triggering moisture formation that can drip down. You’ll also risk food spoilage from temperature fluctuations.
4.2 Checking for Defects
- Inspect the entire rubber seal around the doors for rips or mold growth.
- Gently run a piece of paper between the closed door and the fridge. If it slides out without resistance, your seals are not forming an airtight bond.
- Feel for cold air leaks with your hand along the door perimeter.
4.3 Replacing the Seal
If you uncover serious dryness or warping in the seal, order a new gasket matching your fridge brand and model. Replacing it ensures a tight seal that keeps temperature stable while averting condensation or water pooling.
5. Review the Water Filter for Proper Installation
5.1 Role of a Water Filter
If your fridge includes a water dispenser or built-in ice maker, it likely has a water filtration system. Improper filter alignment or expired filters can cause suboptimal water flow or even drips around the filter housing.
5.2 Double-Check Filter Position
- Turn off the fridge’s water supply before removing the filter.
- Inspect O-rings for cracks or misalignment.
- Ensure the new or reattached filter snugly fits—too loose or over-tightening can cause small leaks.
5.3 Replacing the Water Filter
Most water filters last around six months before clogs hamper water flow. If you see discoloration or taste changes in your water, or if water pressure diminishes, it’s time for a filter replacement.
6. Ensure the Refrigerator Is Level
6.1 Importance of Proper Leveling
A fridge that’s tilted forward or backward can disrupt the normal path of condensation runoff, letting water pool or spill. Checking if your fridge is balanced on the floor ensures the internal design angles can route defrost water properly to the drain hole.
6.2 How to Check
Use a small spirit level on the fridge top. Adjust the front or rear feet until it’s even. If you see consistent leaks and can’t resolve them, verify that the appliance stands level on stable ground.
7. Investigate Ice Maker or Water Dispenser Issues
7.1 Ice Maker Glitches
Ice makers rely on proper water supply lines and an integrated valve. If lines freeze or the valve fails, you might spot puddles near the freezer or discover half-frozen cubes. Clear possible blockages with warm water or defrost any ice lumps manually.
7.2 Water Dispenser Troubles
If your dispenser drips after dispensing or fails to stop, you might have a misaligned valve or a loose water line. Confirm no clogged or kinked lines behind the fridge and that your water inlet is secure.
8. Perform a Routine Cleaning of the Drain and Seals
8.1 Eliminating Debris
Unwanted food scraps or residue frequently gather around the drain or near the door seals. Minimizing that buildup prevents backups and helps maintain an airtight environment.
8.2 Steps for Effective Cleanup
- Door Gaskets: Wipe with warm water mixed with mild detergent, removing stickiness or mold.
- Drain Region: Use a straw or coat hanger to remove blockages, then flush gently with hot water or soapy solution.
- Gently re-check after each cleaning cycle to confirm any leftover gunk has washed away.
9. Monitor Temperature Settings for Proper Operation
9.1 Calibrating Internal Temperatures
A fridge’s internal thermostat or digital control ensures compartments remain consistently cold to protect produce and meats from spoiled conditions. If your fridge or freezer runs too warm or too cold, adjusting the temperature dial or panel might fix mild irregularities.
9.2 Indicators of Improper Settings
- Food freezing in fridge drawers
- Drinks not as cold as expected
- Suspected ice forming around the lower freezer edges
9.3 Quick Fix
Confirm the control panel reads an ideal temperature—around 37-40°F for fridge and 0°F for the freezer. If large temperature fluctuations persist, deeper mechanical issues—like a faulty temperature sensor—may be at fault.
10. Consider the Age and Condition of the Refrigerator
10.1 Weighing Repairs vs. Replacement
A fridge running on worn components or well beyond a decade can become a recurring headache. If breakdown frequency climbs, it might be more cost-effective to invest in a newer, energy-efficient model. Evaluate how many times you’ve dealt with a persistent water or temperature issue in the past year.
10.2 Checking for Obsolete Parts
Manufacturers eventually discontinue certain lines or parts. If your older fridge experiences a critical mechanical meltdown, sourcing replacements can be expensive or impossible. Tally the approximate cost of new parts plus labor to see if an upgraded fridge is better.
11. Evaluate Surrounding Conditions and Proper Ventilation
11.1 Environmental Factors
Fridges placed in extremely warm or humid corners—like near a sunny window or a poorly ventilated garage—face extra strain. The humidity fosters condensation inside, while direct sunlight can heat the external panels, causing excess or unnecessary meltdown cycles.
11.2 Avoid Overcrowding or Blocking
Ensure a few inches of space around your fridge’s back and sides for airflow. Overcrowded corners hamper the fridge’s internal vent systems, leading to potential freezing or leaking scenarios.
12. Seek Professional Help If Leaks Persist
12.1 When to Contact Experts
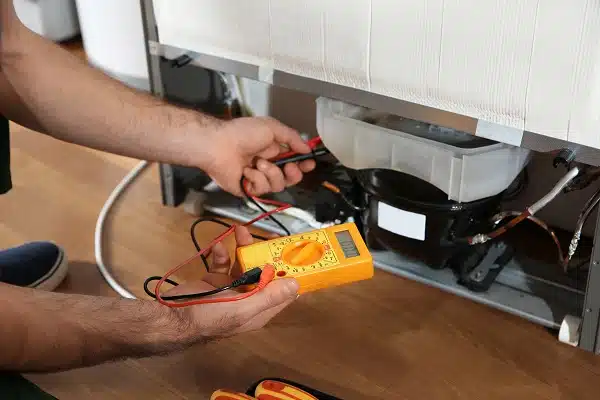
If all quick checks—like cleaning the drain, verifying the water supply lines, or adjusting temperature controls—fail, your fridge’s problem could be deeper. Potential severe mechanical flaws may call for specialized knowledge. A failing evaporator fan, a cracked reservoir, or hidden power issues all require advanced tools and training.
12.2 Hiring Skilled Technicians
Professional services bring in top-grade diagnostic gear, ensuring accurate detection. They also handle complicated repairs, from removing entire panels to replacing delicate circuit boards. Spending that money once prevents repeated partial fixes that cost more in the long run.
13. Regular Maintenance to Prevent Future Leaks
Prevention remains key to maximizing a fridge’s lifecycle and avoiding a water fiasco every couple of months:
- Check for Loose Components: Feel for subtle vibrations or verify that door hinges remain stable.
- Maintain Defrost Schedules: If your fridge lacks automatic defrost, run a manual defrost occasionally to keep the freezer free of ice accumulation.
- Clean the Drain: Flushing the drain hole with warm, soapy water every few months keeps the lines free of debris or leftover food scraps that cause blockages.
- Clear the Door Seals: Sticky substances or food drips hamper an airtight closure, letting moisture creep in.
How Can Toronto Refrigeration Help?
Toronto Refrigeration has served both residential and commercial clients with professional yet approachable appliance repair solutions. Our commitment to customer satisfaction stands at the heart of every project—whether you’re dealing with a water leak in your fridge or a faulty motor in your washer. Our licensed appliance repair technicians undergo rigorous training to pinpoint even the smallest potential issues. We excel at same-day or short-notice repair calls, ensuring minimal inconvenience for your busy schedule. By combining advanced diagnostic tools, quality replacement parts, and unwavering dedication, we handle challenges from ice maker line blockages to broken door seals—delivering consistent performance that keeps your fridge (and other appliances) in prime condition.
Conclusion
A leaking refrigerator isn’t just a minor annoyance—it jeopardizes stored food, can raise energy bills, and risks water damage if left unmanaged. By examining crucial areas—like the defrost drain, door seals, drain pan, and water supply connections—you address the majority of everyday leak sources. Complement these checks with routine maintenance and careful monitoring of your fridge’s environment to prevent new leaks. And if persistent issues outstrip your comfort level, turn to Toronto Refrigeration for a swift, professional resolution that secures your fridge’s longevity and your own peace of mind.